Insert module
In the video you can see, how to prepare your page for modules.
Below you will find a more detailed walkthrough of how to insert modules on a page.
Go to page editor
To insert a module, you must be in 'Experience Editor'.
Open the page you want to edit, select the Publish tab and click Experience Editor.

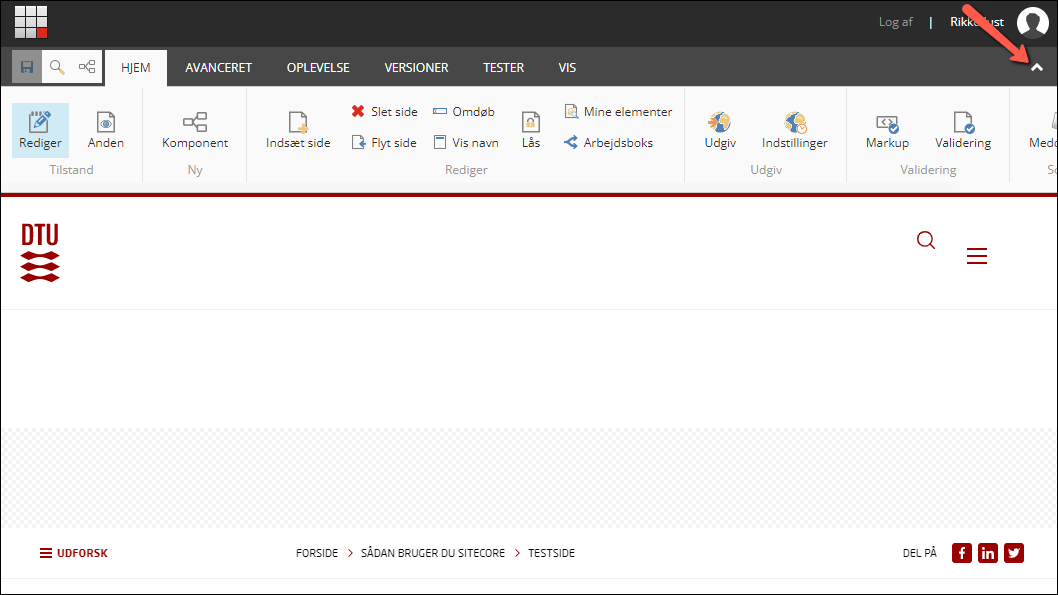
Here you have access to a toolbar with various tools.
If the toolbar is not visible, you can open it by clicking on the small arrow in the upper right corner.
Insert container
To insert a module, you must first insert a container for modules.
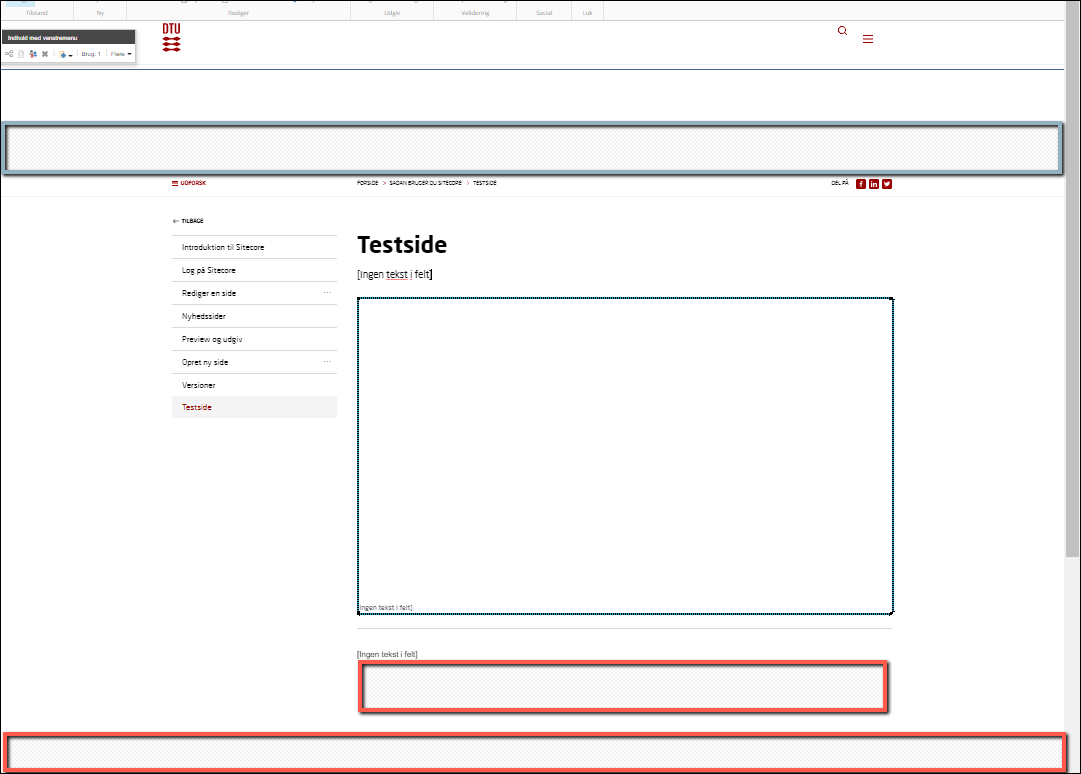
You can insert containers in the shaded areas marked in red in the image:
- Content next to left menu: Modules inserted here are displayed to the right of the left menu, and can fill up to 9 columns in width.
- Content after the left menu: Modules inserted here are displayed after the left menu, and can fill the entire width of the page, i.e. up to 12 columns.
The content area at the top 'Top banner region' is reserved for a top banner, which is only used on the front page of a site and pages in the top menu. Contact the web team if you need to have a top banner placed on the front of your site or on the second level.
Select container size
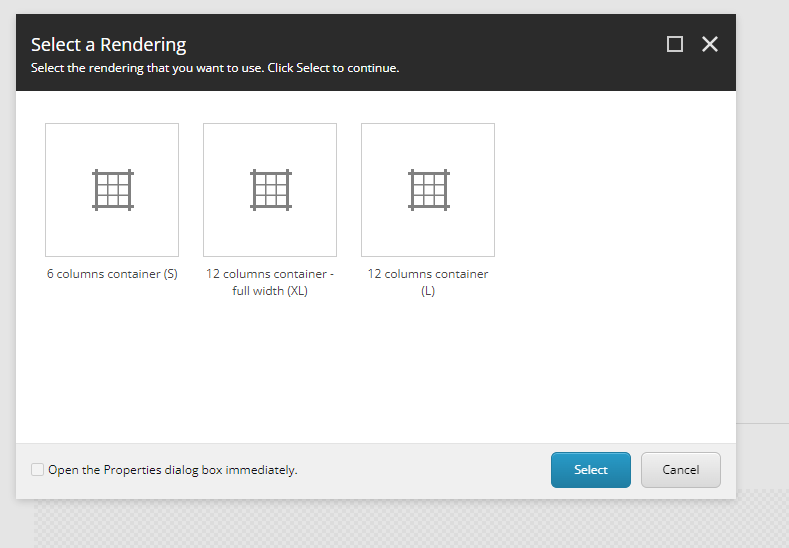
Choose the size container you want.
In the content area next to the left menu, you can choose:
9 columns container next to left menu (M): medium size container placed to the right of the left menu.
In the content area after the left menu, you can choose:
6 columns container (S): small container placed in the middle of the page.
12 column container - full width (XL): large container that fills the entire width of the page to the edge. NOTE: Here you can only insert modules of the type 'Wide module'.
12 columns container (L): large container that fills the entire width of the page, but not to the edge.
Click on the desired size container and click on Select.
Name and save container
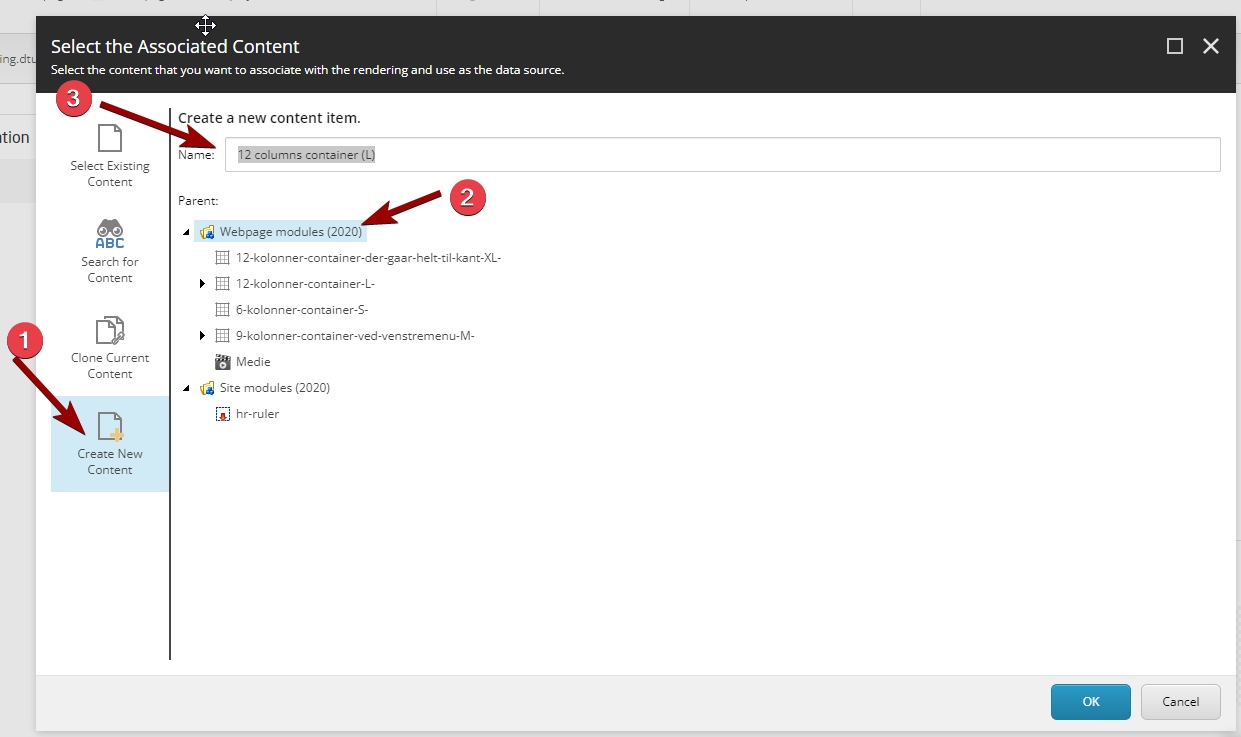
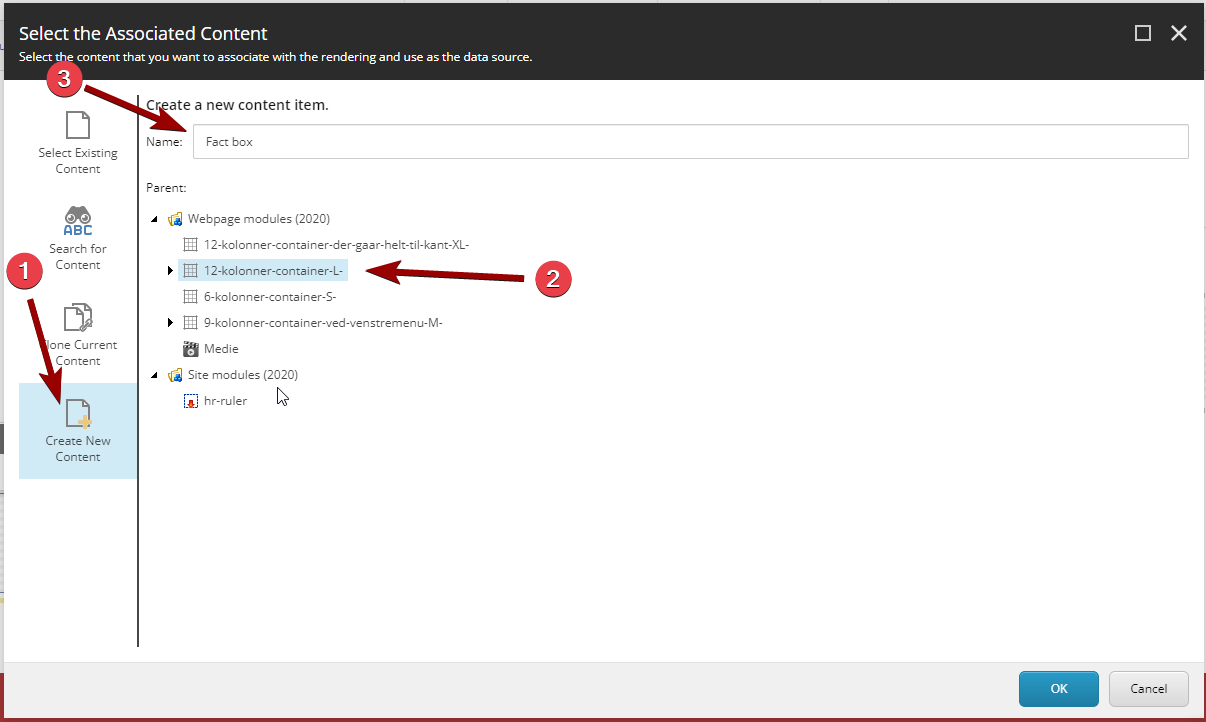
Now click on Create new content and then enter a name in the Name field.
TIP: If you have many containers on your site, it is a good idea to be careful with your naming so that you can more easily distinguish the containers from each other.
The new container is saved by default in the 'Website modules (2020)' folder. This means that the container can be used on the current page.
You can also mark the folder 'Site modules (2020)', and thus save the container here. If you do this, your container can be used on all pages across the site. This can be an advantage if you have content that needs to be reused on several pages. Read more about Site modules [REMEMBER LINK]
Insert the container by pressing Ok.
Insert cell
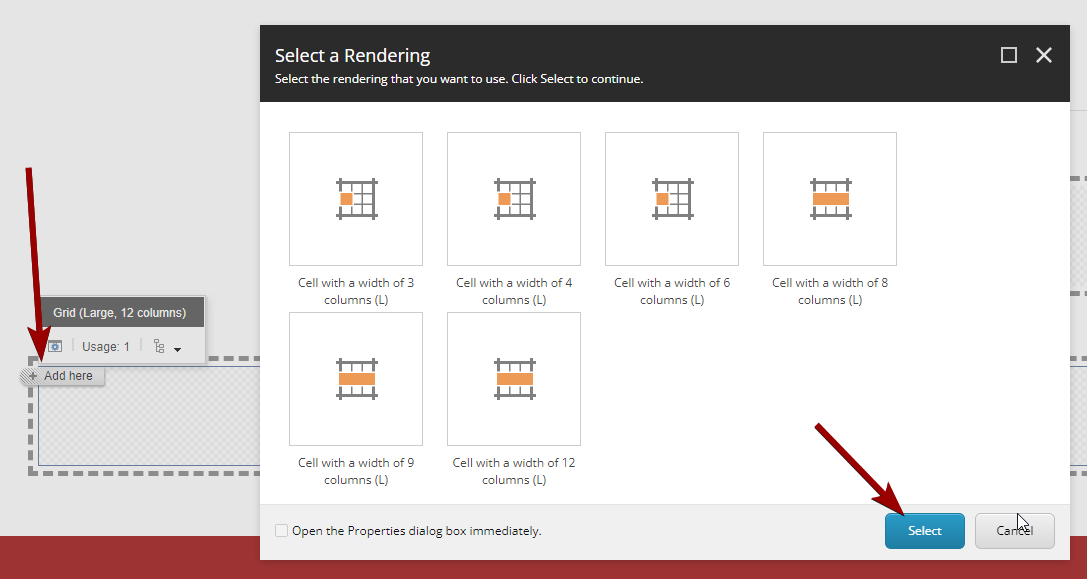
In the container, you must now insert a cell which determines how wide your module will be.
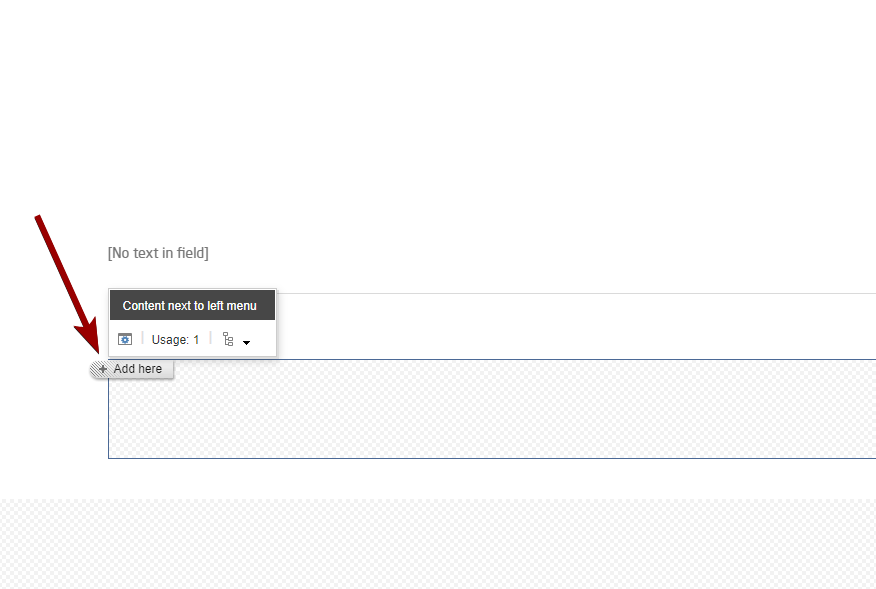
Click in the container, select Add here and then the type of cell you want. (Depending on the size of the container, you can choose different cell widths.)
Click Select to insert the cell.
NB: Be aware that the cell is important for which type of modules you can insert. Not all modules can be inserted in all cell widths. Read more about module types
Insert module
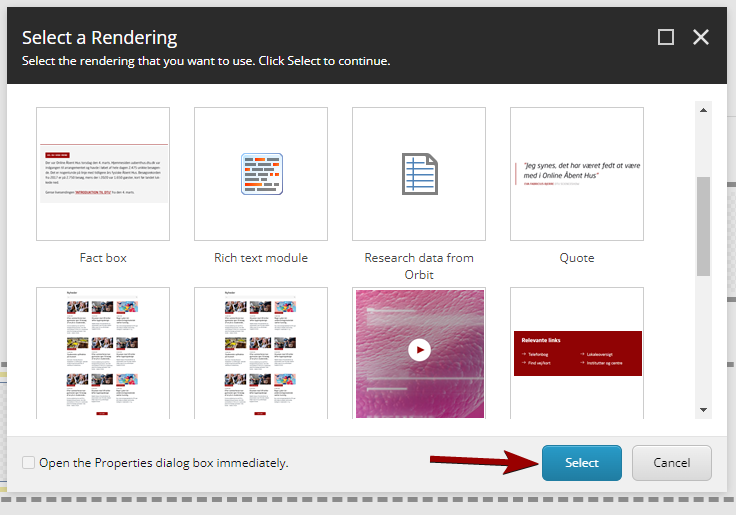
Now insert your module into the cell by clicking Add here.
Select the desired module and click Ok.
Name and save module
Then click on Create new content and enter a name in the Name field.
TIP: A new module is basically saved in the 'Website modules (2020)' folder. If you have many modules and containers on your page, it may be a good idea to save the module under the container it is in. Select the relevant container before clicking Ok, and the module will be saved below.
TIP: If your module is to be reused in several places on the site, you can save it in the 'Site modules (2020)' folder, then the module will be selectable on all pages of the site.
Click Ok to insert the module.
Tips and Tricks
Add more containers, cells and modules
Add more containers:
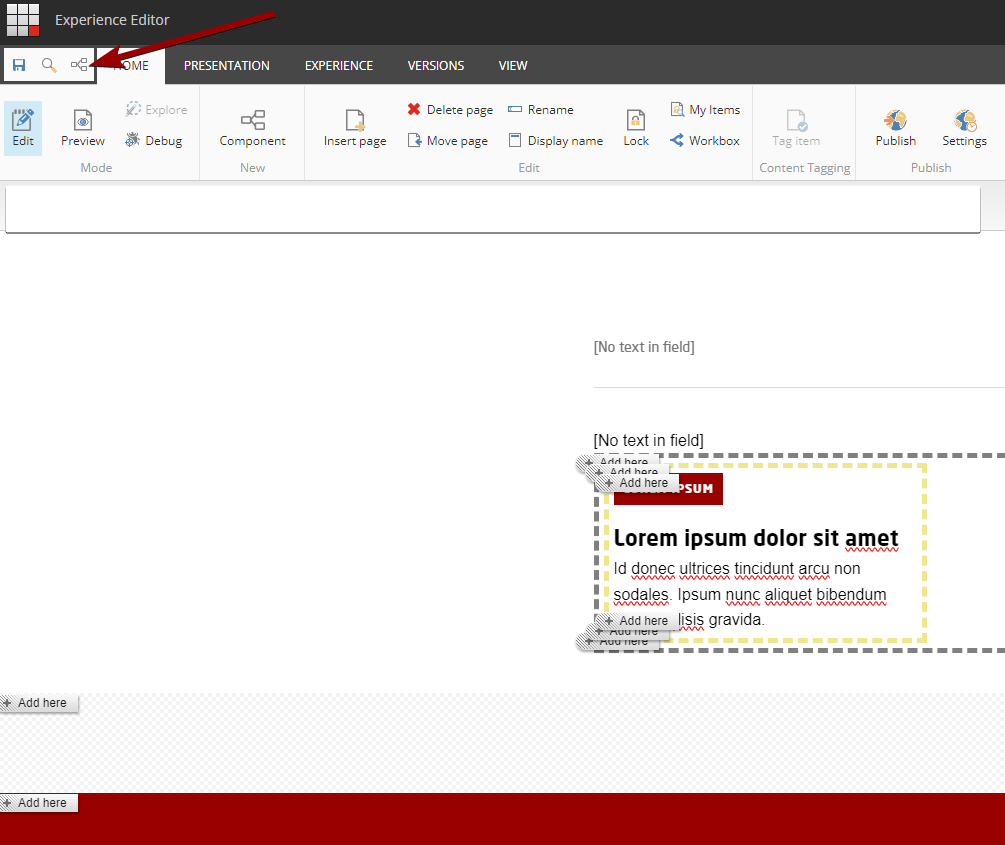
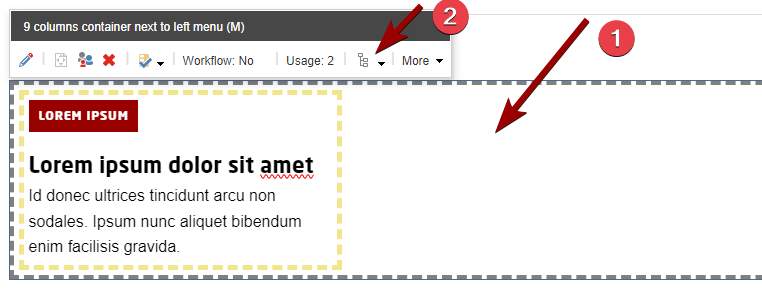
To add a container to a content area where a container has already been created, click on the existing container (or on its gray border if it's hard to reach).
NB: Pay attention to what is written in the black bar in the toolbar - it indicates which element you have selected.
Then click on the icon that looks like a hierarchical structure.
Now you get the option to select 'Add here' and can add an additional container.
Add more cells:
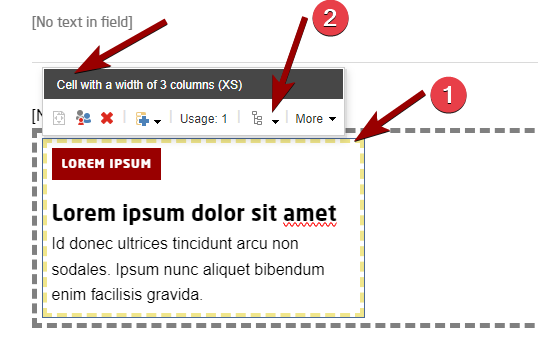
To add a cell to a container where a cell has already been created, click on the existing cell - it's easiest to hit the yellow border.
NB: Pay attention to what is written in the black bar in the toolbar - it indicates which element you have selected.
Then click on the icon that looks like a hierarchical structure.
Now you get the option to select 'Add here' and can add an extra cell.
Add more modules
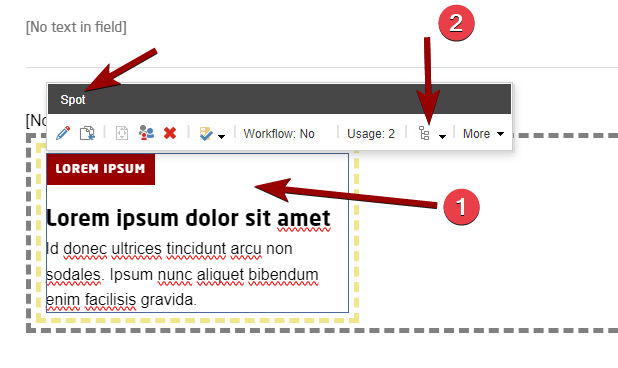
To add a module to a cell where a module has already been created, click on the existing module.
NB: Pay attention to what is written in the black bar in the toolbar - it indicates which element you have selected.
Then click on the icon that looks like a hierarchical structure.
Now you get the option to select 'Add here' and can add an additional module.
Add new component
To add a new component (container, cell or module) to your page, you also have the option of clicking the Add a new component button in the toolbar at the top of the editor window or in the 'Home' tab.
You will then have the option to click Add here in all the places on the page where it is possible to add new components.
TIP: Hover your mouse over Add Here and an alt text will tell you where the new component will be added.
